Sunday, August 13, 2017

Painting purple Clematis in oil paints, and a Crepe Myrtle tree not massacred by Sandra Cutrer Fine Art

I love Clematis, and I don't know why I haven't painted it before. Clematis is actually a gorgeous flowering, easy-to-grow vine. So, here goes. 


I start off with some dark purples, and the red that I see in the blooms. I think i ma going with a textured look. I've already dipped into the background with greens. I use a Phthalo green, Sap green, and Thalo yellow green. I also add some French Ultra Marine blue in the mix at times- for the darker greens.

I work fast, so I don't "over-work" my piece. A close-up shot reveals lose and large strokes. I use a palette knife, as well as a large and small brush,


Here is a shot of the canvas side. Although it is only a .75" wrapped canvas, I usually try to always paint the sides of my canvases, just in case my buyer would rather not frame the work.


A shot of a timid bloom.


The finished painting.

I hope you've enjoyed a few steps in my painting process. Please click on the link provided below to go directly to my Etsy Shop, where this piece is listed for sale.

https://www.etsy.com/listing/550504119/flowers-purple-clematis-textured-oil?ref=shop_home_active_1


Blessings to you and yours, 
Sandra Reeves Cutrer
Fine Art


Tuesday, August 8, 2017

Painting a Bull in Oils by Sandra Reeves Cutrer Fine Art


 I apologize right off. I did not take enough photos of my painting process. I get so carried away at times, once my sketch is ready, I can hardly wait to add my brilliant, happy, and creamy oils colors! Truly, on the days I am able to paint, it is like being a kid at Christmas!!!


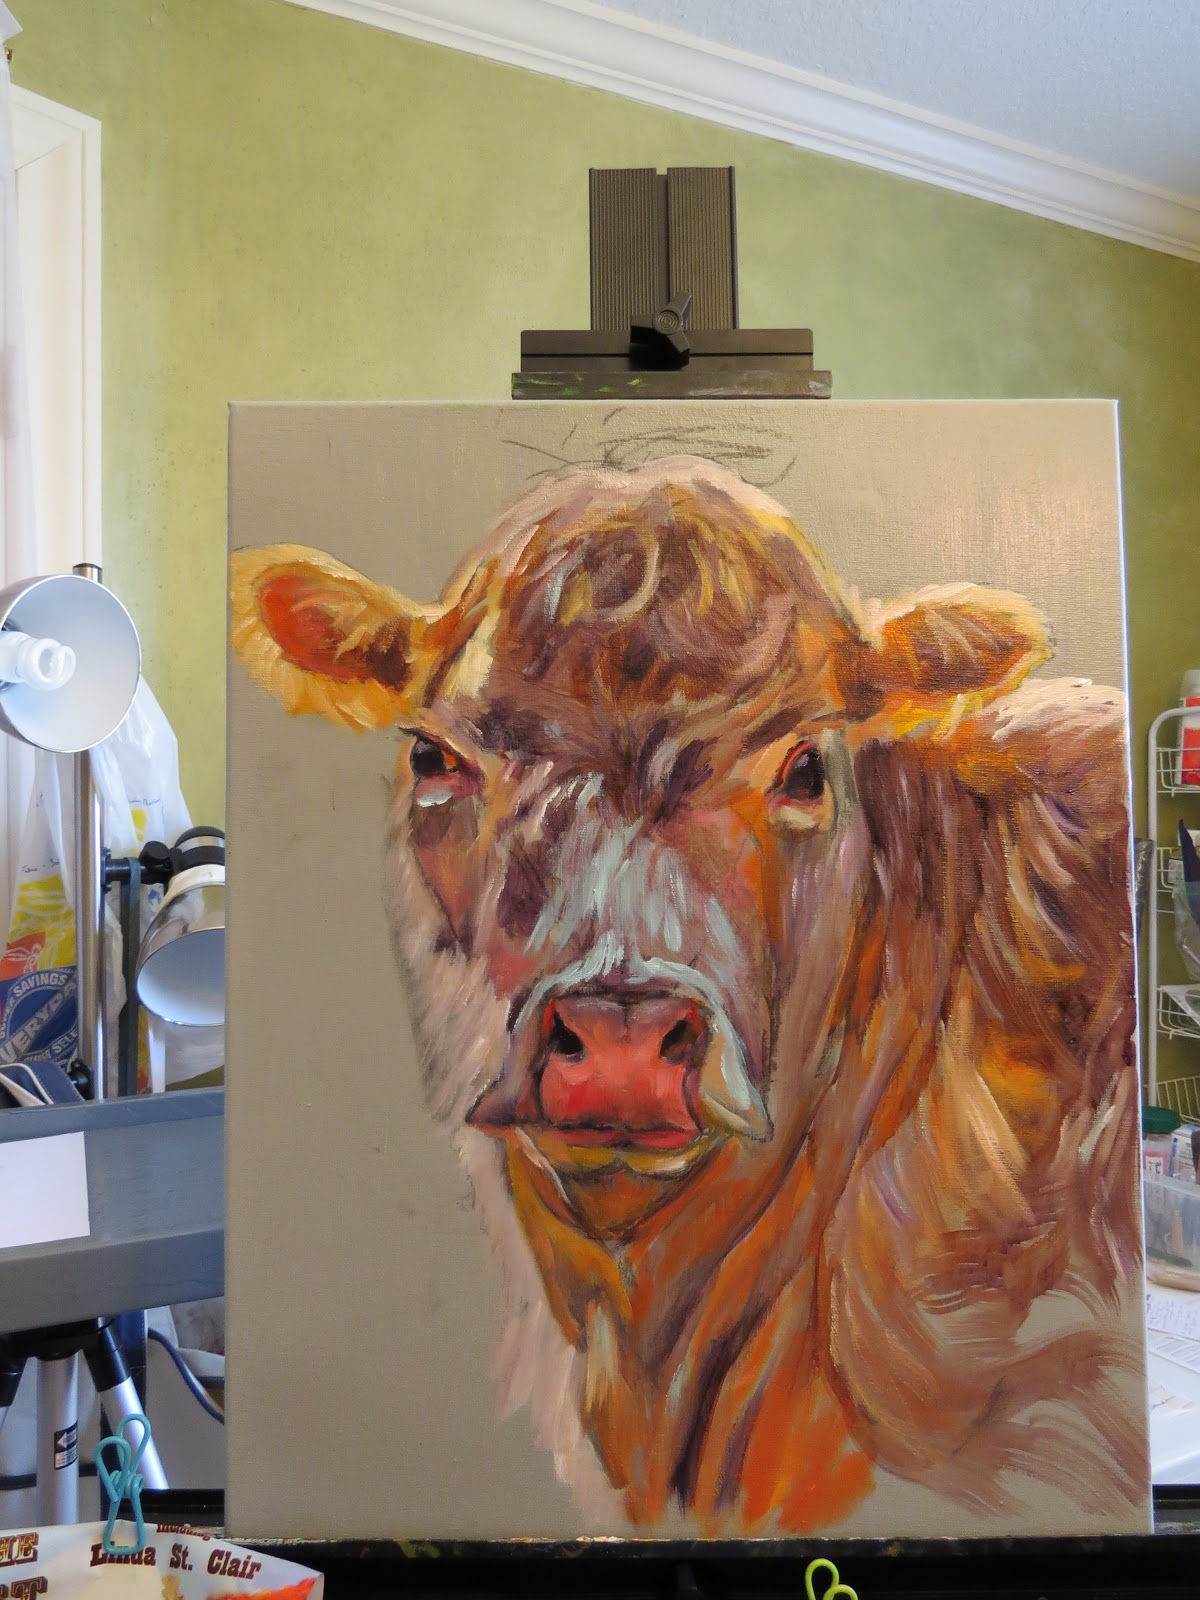
 I have my  pencil sketch ready on my 16" x 20" stretched canvas. I always keep a copy of my reference photo near, or attached, to my easel. I wish I was talented enough to paint form images in my head, but that has never been the case for me. I love taking my own photographs for my paintings, to avoid any one  trying to claim my work was copied from one of their photos. I took the photos of this gorgeous bull on the outskirts of Fredricksburg,TX. I've visited this quaint, tourist-loving town, on many occasions.I love shopping the old downtown stores, and visiting their great art galleries, restaurants, and spending a few nights in one of the many getaway cabins offered in this area.

Here I have already added many stokes of the undercoating, nose area, ears, and a flow of the way the hide hair is growing on this magnificent bull. It was a bull, and no, there were no horns on him, so I assume he is a polled bull. I have tried to research the breed, but wasn't able to pull up anything that looked exactly like him! I've attached a little bit of facts about that below:Polled cattle have absolutely no horns, nor scurs nor bare spaces where a pair of horns may have been, whatsoever. The best way to tell is if a cow, bull, steer or heifer is polled is by looking at the poll, itself located just above and between the ears. If it forms some sort of peak, then the animal is indeed polled, not horned, scurred or dehorned.
  • Many cattle breeds that are being used for commercial beef and dairy which have been historically horned also have cattle which are polled. Naturally polled breeds, though, do not have both horned and polled cattle.

I have worked on creating a soft background, so I don't take away form the focal point- this amazing animal! I was surprised that he allowed me to take many photographs of him, never moving, flinching, or fussing at me.Of course, I was a safe distance away, with a fence between us. He was probably interested in me as much as I was in him, or maybe it was more about wondering if I were a new face coming to give him his afternoon meal!


Here is my finished painting. He sold right away, shipped in a wood frame, and ready to hang. My buyer let me know she was well pleased with her newest oil painting. But, I think I am always more pleased than my buyers, when I can make someone happy with my art work.

Please come back and visit my blog.
 I hope you are all keeping cool during this HOT August weather. I am staying inside as much as possible,although Malee is still insistent that she be allowed to "sun" on the patio. No need to worry, I pick her up and bring her in periodically, as well as make sure she has a bowl full of fresh water, and her healthy kitty food.


Blessings,
Sandra Cutrer
Fine Art


Monday, August 7, 2017

Painting a cat in oils by Sandra Reeves Cutrer Fine Art


As you can see, I am using a reference photo. No matter how hard I try, MaLee refuses to pose long enough  for me to paint her portrait.She prefers the quick camera shots!

I have my sketch in, and decided to add the background color first. Most of the time I wait on the background color, either at least half-way through my painting, or until the very end. But, today I've decided to add in the background color first because of the bright color I've chosen, helping me to  keep my other colors on the brighter side. At times we may feel that the background color helps us to build up the rest of our painting. It all depends on how you feel. If you aren't sure, or just beginning to paint, wait on your background color. Later, the correct colors for the background will come to you!

Here I've added in a layer of her blue, blue eyes (exactly what  drew me in to rescue her), as well as her petite nose, and of course, the dark under-painting areas. They are made up of a mixture of Alizarin Crimson red and French Ultra-marine blue, thinned with some odorless turp.

Note that I have placed some of the eye color under her neck area. When I start adding in her light coat colors, the blue will be there to add a sort of shadowed effect. Always add several of your colors in more than one place, to create a way for the viewers eye to roam throughout the whole painting. A color here and there, with no link, will make a choppy painting effect and lose your viewer!

I am building up her coat, not too light, not too much at once. I always allow my newest layer to dry before adding another one.  If you don't do this, you will end up with a muddy mess. Oils =  PATIENCE!

Here is my completed painting. If you have any questions, feel free to contact me through this blog, or  form my Etsy Shop, where I sell my work.  I love taking custom orders, so feel free to send me any photos you have of your beloved pet, or one of a friend you've like to surprise with a forever treasured gift! Just click on the link below and it will take you directly to my shop.


https://www.etsy.com/shop/SandraCutrerFineArt?ref=seller-platform-mcnav


Wishing you many blessings for a wonderful week,
Sandra Cutrer 

Fine Art

Thursday, August 3, 2017

Painting a dog in oils by Sandra Reeves Cutrer Fine Art

 A beloved dog's portrait in oils on an 11" x 14" smooth Masonite panel.


NOTE: Click on any of the photos to view them larger than they are posted on the blog.
As always, I start with a simple sketch. I use a wash made from a mixture of Alizarin Crimson red and ultra marine blue- equal parts. I add  some turp to a bit of this, thinning the paint so I make a good outline of the sketch, and start placing some of the 'darks' where they need to be in the under-painting. Always with oils, you will need to add some of your darks first. Since this is a "black" dog (remember there is no real black in nature), I am actually adding a reddish under-painting. This dog has a reddish/purplish skin underneath her coat.

Here I have started placing some of the lights on the face, and a background layer. Nothing is close to being completed here., that's why I call it ,"The UGLY Stage"!

I start to place some of the dog's coat colors in at this stage. I always allow my under-painting to dry before adding another, or I will end up with a "muddy" mess!

I am perfecting her tongue and teeth, have the eyes close to being completed. More of her gorgeous coat layers are added.

As you can see, I have added more and more layers of her shiny dark coat, with an equal parts mixture of the Alizarin Crimson.

This custom ordered dog portrait is completed. She is painted in oils on an 11" x 14", prepped and smoothed with Gesso, Masonite panel. Note the detail of the dog's ears. And, yes, that is a true white spot in her left ear (right when viewing), her owners never noticed on her- until they saw the painting!

I hope you've enjoyed reading my blog, and seeing a few of the steps in creating a dog in oil paints.
I would love to create a custom painting of your pet.Please contact me from this blog, or my email address: sandrasart777@aol.com

Blessings,
Sandra Cutrer Fine Art

It's raining cats and dogs... by Sandra Reeves Cutrer

I totally enjoy painting pet portraits, in oils, so much! Here are a few of my custom/commissioned pieces. I hope you wil enjoy them.If yo...